Texture matching is where many drywall repairs either disappear—or stay visible forever. In New Albany, IN homes, we often see mixed wall histories: old orange peel in one room, knockdown in another, and previous repairs that changed pattern density near outlets, corners, or removed fixtures.
The goal is not to make a patch “flat and smooth.” The goal is to make the repair read like the surrounding wall in normal movement and everyday light. That means matching profile, not just covering damage.
Why texture matches fail after primer
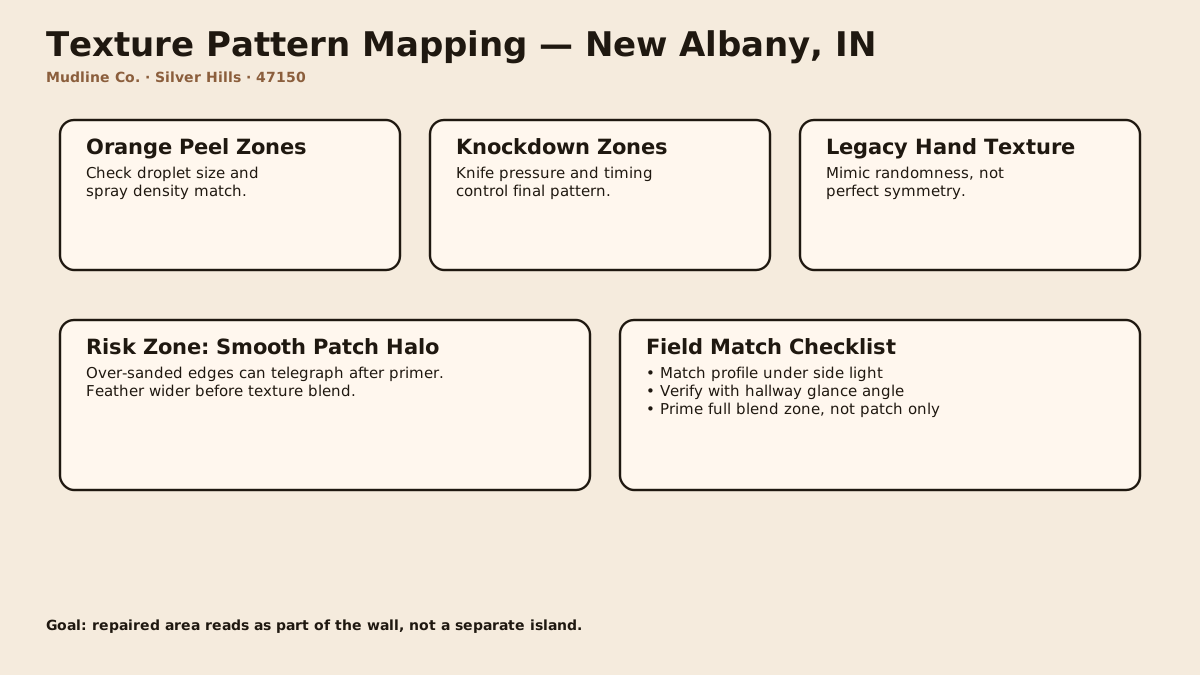
Most mismatches come from three repeat issues: over-sanded patch edges, incorrect pattern density, and final checks done only under overhead light. A repair can look good from two feet away but still flash from the hallway once paint dries and side light hits the wall.
New Albany homes around Silver Hills and older Floyd County neighborhoods often have subtle hand-applied variation. If texture is applied too uniformly, the repair can look newer than the wall. If the edge is sanded too aggressively, a halo forms around the patch.
Start with pattern mapping before compound decisions
Before repair, map the existing wall: identify texture family (orange peel, knockdown, legacy hand pattern), estimate density, and note transition zones. Then test on a sample board before touching the final wall. This quick step saves rework and prevents over-correction.
- Profile check: match droplet/knockdown shape, not just overall roughness.
- Density check: count pattern coverage across a similar area.
- Edge check: feather wider so blend zone reads natural after paint.
Lighting-angle QA that catches mismatches early
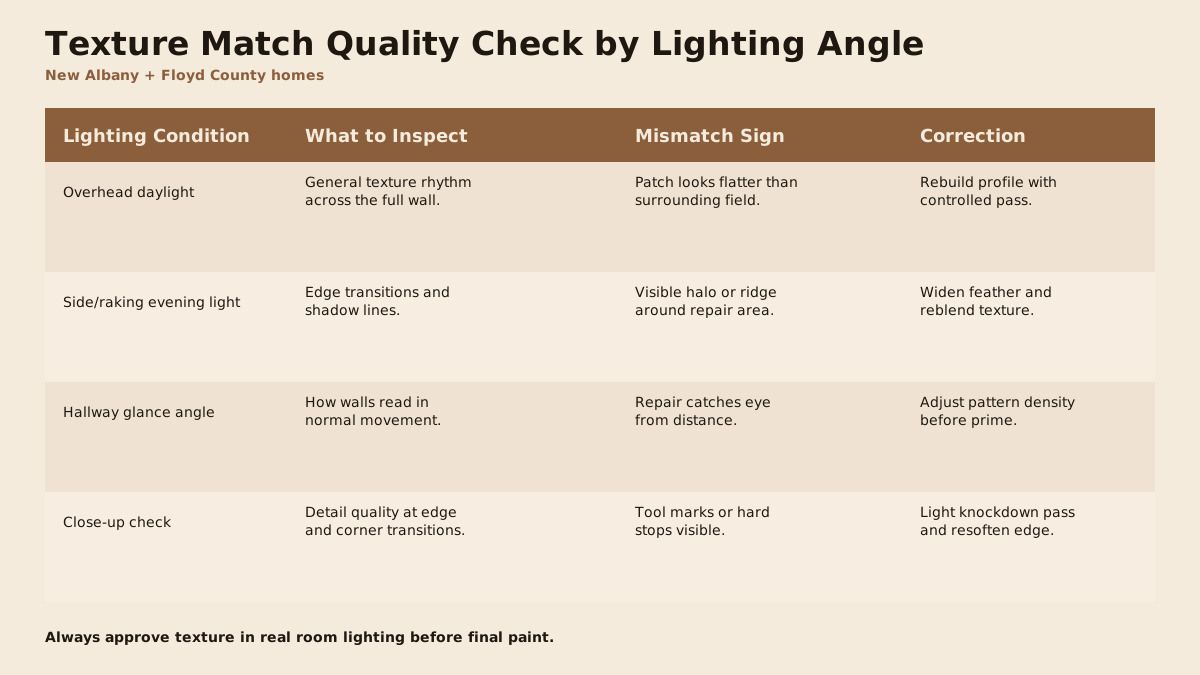
Texture should be evaluated from multiple angles: overhead daylight, evening side light, hallway glance angle, and close-up detail. Each angle reveals different defects. Side light is the fastest way to catch halos and ridge lines before primer locks in the mistake.
Reliable sequence for New Albany texture repairs
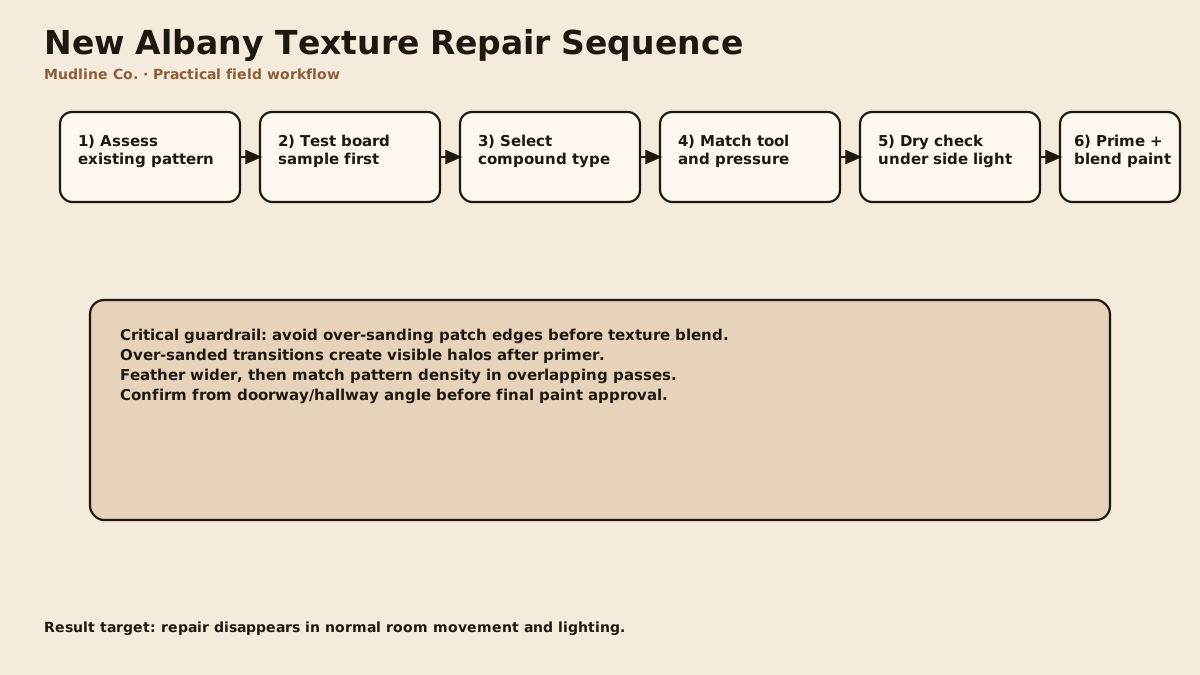
We use a consistent sequence: assess existing pattern, run a test sample, choose the right compound response time, match tool pressure, let it dry, check under side light, then prime and blend paint across the full transition area. This keeps repairs from appearing as isolated spots.
Avoid over-sanding patch edges before texture blend. It is the most common cause of visible repair halos after paint.
When to use wider blends instead of tighter patches
If the wall sits in strong side light, if paint sheen is higher than flat, or if surrounding texture is already uneven from older repairs, use a wider blend zone. A tight patch may save minutes now but creates obvious boundaries after finish paint.
For homeowners, this is the difference between “fixed” and “actually invisible.” For builders and property managers, it is the difference between one visit and a callback cycle.
Bottom line for New Albany homeowners
Texture matching is a craft step, not a paint-afterthought. When profile, density, edge blending, and light-angle checks are all handled correctly, patched areas stop drawing attention and the room feels consistent again.
Need texture-matching drywall repair in New Albany? Send us the project details and we’ll provide a written quote within one business day.