Old-house drywall repair in La Grange is different from patching a newer subdivision wall. Many homes around Main Street, the KY-53 corridor, older Oldham County farm properties, and 40031 ranch houses have lived through decades of seasonal movement, repaints, remodel tie-ins, roof work, plumbing updates, and small repairs that were handled one spot at a time. The wall you see today is often a record of all those decisions.
That is why the best repair plan starts before mud ever hits the wall. A crack above a doorway might be a normal settlement crack, but it might also be a framing movement line. A stained ceiling patch might be dry now, but the leak history still matters. A plaster edge tied into drywall can look flat before primer and then show a halo after paint. La Grange homes deserve a repair process that respects those older surfaces instead of treating every patch like new construction.
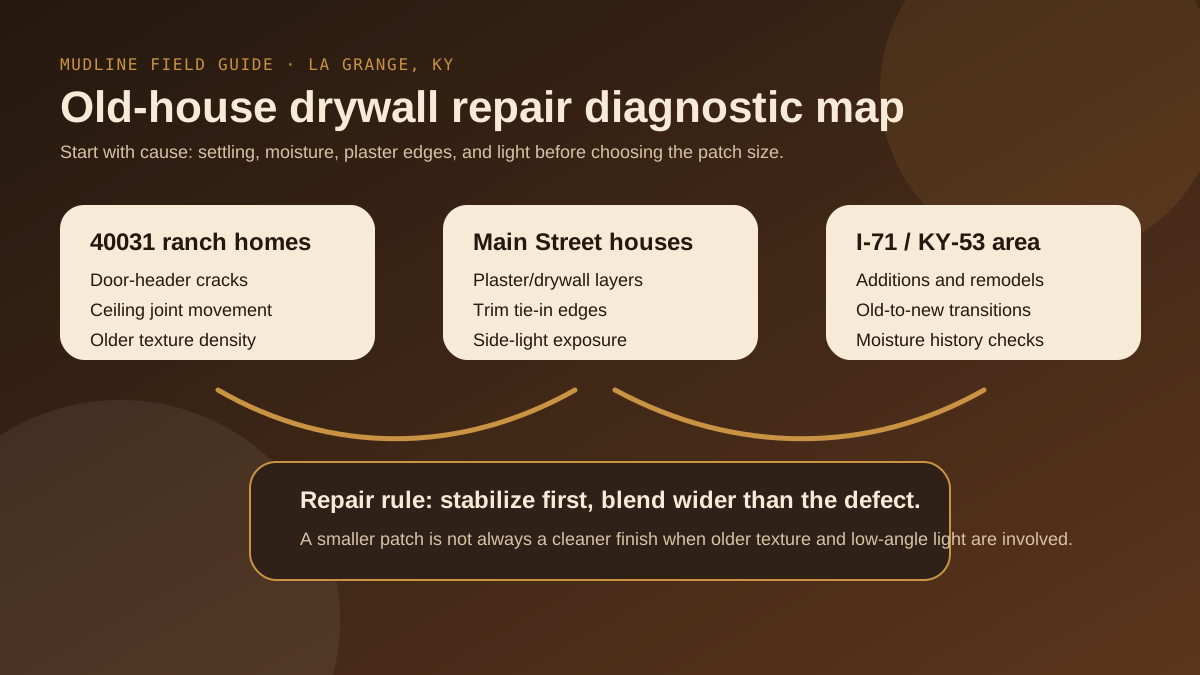
Start with the reason the wall failed
The most useful question is not “how big is the crack?” The useful question is “why is this crack here?” In older La Grange houses, we commonly look for door and window stress points, ceiling-joint movement, roof or plumbing moisture history, old tape seams, prior patch buildup, and plaster-to-drywall transitions from past remodels. Each cause points to a different repair approach.
If a seam failed because old tape released, the repair needs clean removal, fresh tape or reinforcement, and a wider finish zone. If the wall is still moving, the customer needs honest expectations and possibly source correction before cosmetic repair. If moisture was involved, the area has to be dry and sound before closing it back up. Skipping that diagnosis may make the wall look better for a few weeks, but it increases the chance of a repeat line.
Texture transitions are where old-house patches get exposed
La Grange has a mix of smooth walls, light orange peel, older knockdown, hand-applied ceiling patterns, and rooms that have been painted enough times to soften the original texture. Matching those surfaces is not only about choosing the right texture tool. It is about choosing where the texture should fade back into the old field.
A tight patch box is the enemy. When the compound and texture stop too close to the damaged area, the eye catches a rectangle even if the center of the patch is flat. A better plan is to finish the repair to plane, feather the edge farther than the cutout, test the texture density, and evaluate it from the normal room entry points. In a hallway, that might mean checking long sightlines. In a dining room or front room near Main Street, it may mean checking afternoon side light across the wall before final paint.
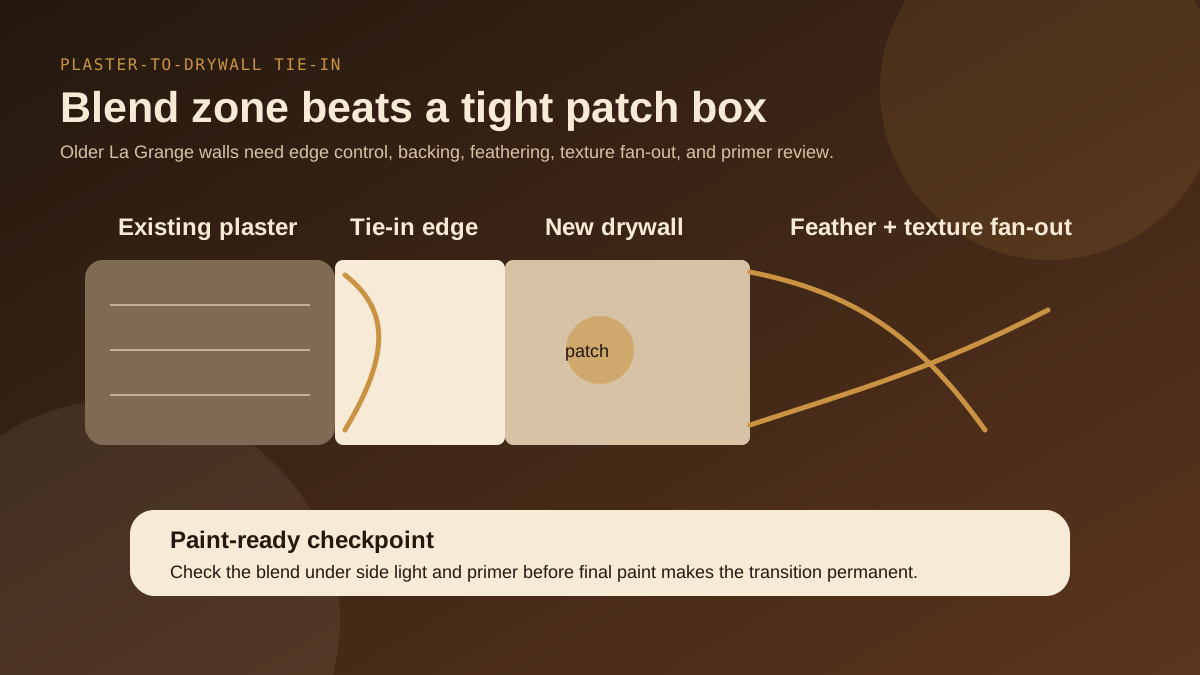
Plaster tie-ins need edge control
Some older La Grange rooms include plaster, drywall, or both. A remodel may have replaced one wall, opened a doorway, moved a cabinet line, or added an upstairs access point while leaving adjacent plaster in place. Those tie-ins need careful edge control because plaster and drywall do not always move, absorb, or sand the same way.
The first step is to avoid building a hard ridge at the transition. The second is to make sure the edge is stable enough to receive tape, compound, or reinforcement without crumbling back. The third is to carry the finish coats wide enough that the transition has room to disappear. That extra blend zone may feel like more work than the size of the crack suggests, but it is often what keeps the patch from flashing after paint.
Primer reveal matters more than guesswork
Paint changes what the wall tells you. A raw compound surface can hide shallow waves. A textured surface can look acceptable until the first uniform coat tightens everything visually. That is why primer reveal is so valuable on older wall repairs. Primer helps show edge buildup, sanding scratches, missed texture density, and places where the patch catches light differently than the surrounding field.
For homeowners, this means a repair should not be judged only while the room is dusty and unfinished. Look from the doorway. Look across the wall, not only straight at it. Turn on the lighting the room actually uses. If a patch is in a kitchen, hallway, stair wall, or room with tall windows, side light can be the deciding factor. The best time to correct that is before the final paint locks in the repair.
How La Grange location affects scheduling and prep
Local context matters. A small repair near downtown La Grange or Main Street may involve tighter parking, older trim, and occupied-home dust containment. A larger project off KY-53 or closer to I-71 may include additions, basements, garage conversions, or farm-property access. Those details affect how the work zone is protected, how materials are staged, and how much time should be allowed between coats.
Drywall is a dusty process — we do not pretend otherwise. The practical goal is to manage it with plastic, floor protection, controlled sanding, and daily cleanup. In older homes, dust control is also about protecting trim, vents, finished floors, and adjacent rooms that may not be part of the repair. You will still see some dust around the active work zone, but a planned setup keeps it from becoming the whole-house problem customers worry about.
What to send before quote day
Good photos make the quote more useful. Send one wide room photo, one close photo of the damage, one angle-light photo if the wall catches sunlight, and any photos that show the ceiling height, trim, access, or furniture around the repair. If the repair follows a leak, include what caused it and whether the source has been fixed. If the patch ties into plaster, mention that too.
For texture matching, close photos should include the surrounding wall, not only the damaged spot. A quarter-sized close-up of the texture can help, but the larger field tells us whether the wall has old roller stipple, softened knockdown, heavy paint build, or uneven prior repairs. Those details help us choose a repair boundary and explain what “paint-ready” should mean for that room.
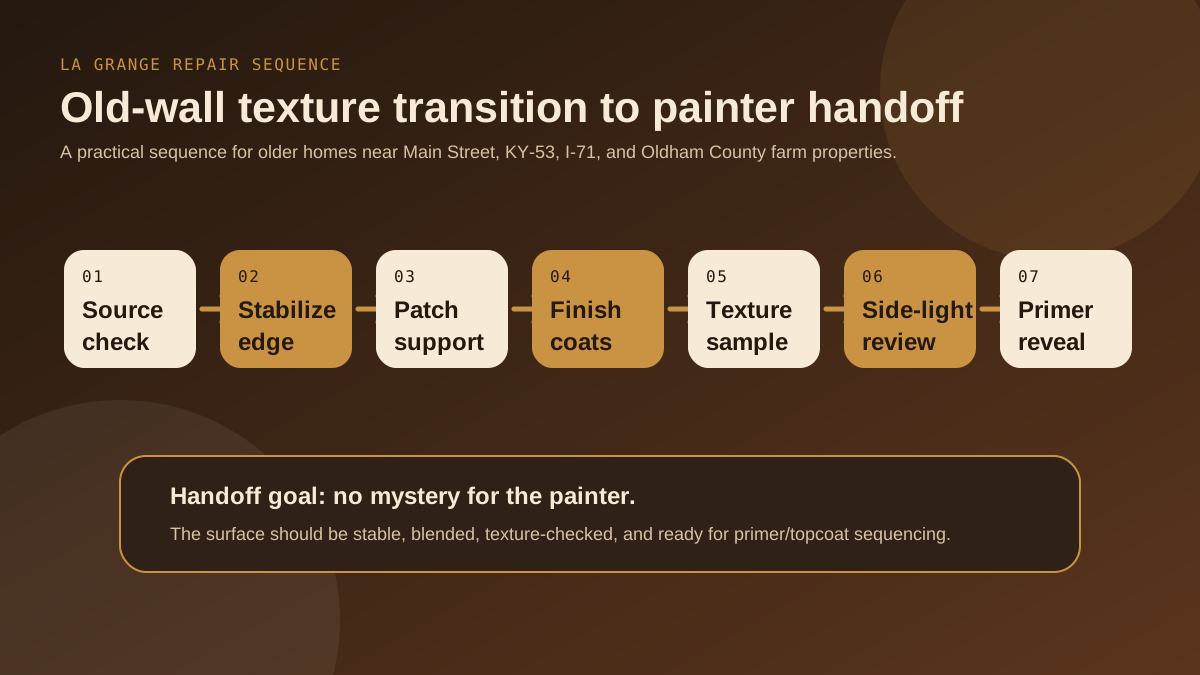
When a larger repair is the cleaner repair
Homeowners understandably ask for the smallest patch possible. Sometimes that is right. But in old-house drywall repair, the smallest patch is not always the least visible patch. If a crack sits near a failing seam, if prior mud is built up around the damage, or if the texture change is already obvious, a slightly wider repair can produce a quieter final wall.
The same logic applies to ceiling repairs. A small ceiling stain may require a larger finish area because ceilings are unforgiving under light. If the patch edge lands in the middle of a smooth field or a repeated texture pattern, it may need a broader blend to keep the eye from reading a square. A good quote should explain that tradeoff plainly so the customer knows why the repair boundary is being chosen.
Paint-ready does not mean paint will hide everything
One of the biggest drywall myths is that paint will hide the patch. Paint can unify color and sheen, but it will not fix a proud seam, a hollow edge, a sanding scratch, or a mismatched texture pattern. Paint-ready means the drywall side has done its job before the painter starts: stable substrate, flat finish, controlled texture transition, and a surface ready for primer and topcoat sequencing.
That is especially important in older La Grange homes where surrounding surfaces are not perfectly uniform. The goal is not to erase the character of the home. The goal is to make the repair stop pulling attention. A patch can respect an older wall and still be clean, practical, and ready for the next trade.
Common questions about old-house drywall repair in La Grange
Can you repair drywall cracks in older La Grange homes without replacing the whole wall?
Often, yes. If the substrate is stable and the crack is localized, a targeted repair with proper tape, backing, feathering, and texture blending can be the right approach. Larger replacement only makes sense when the wall is soft, repeatedly failing, or too built up from prior patches.
How do you match texture on older painted walls?
We look at the existing texture density, paint buildup, room lighting, and repair boundary before applying texture. The patch is finished flat first, then the pattern is tested and blended wider than the damaged area so the transition reads cleaner after primer and paint.
Do plaster-to-drywall transitions need a different repair method?
Yes. Plaster edges and drywall patches move and absorb finish differently, so the tie-in needs stable edges, reinforcement where appropriate, wider feather coats, and a careful primer reveal before final paint.
Do you serve homes near Main Street, KY-53, I-71, and Oldham County neighborhoods?
Yes. Mudline handles drywall repair, finishing, texture matching, and paint-ready patch work in La Grange and surrounding Oldham County areas within the Louisville service radius.
Bottom line for La Grange homeowners
Old-house drywall repair is part craft, part diagnosis. The best result usually comes from understanding the wall, stabilizing the problem, widening the blend zone, matching texture with restraint, and checking the surface before final paint. If the repair is planned that way, the patch has a much better chance of staying quiet in the room instead of becoming the first thing people notice.
Need a La Grange old-house drywall repair quoted? Send photos of the room, the damage, the texture, and any leak or settlement history. Mudline can help plan a repair that is practical, honest about dust, and ready for paint.