One of the most common concerns homeowners bring up before drywall work is simple: "How messy is this going to be?" That concern is fair. Drywall is a dusty process, and anyone who tells you otherwise is selling fiction. The practical goal is not zero dust. The practical goal is managed dust — containment, controlled work habits, and daily cleanup so the rest of the home stays protected while the repair gets done right.
This Louisville project is a good example. The scope was focused on a ceiling area that needed fresh finishing and texture matching before paint. The home was occupied, surrounding surfaces had to be protected, and the handoff to the painter needed to be clean. We set containment first, then worked the texture sequence to match the existing ceiling pattern without leaving a visible "patch box" under room lighting.
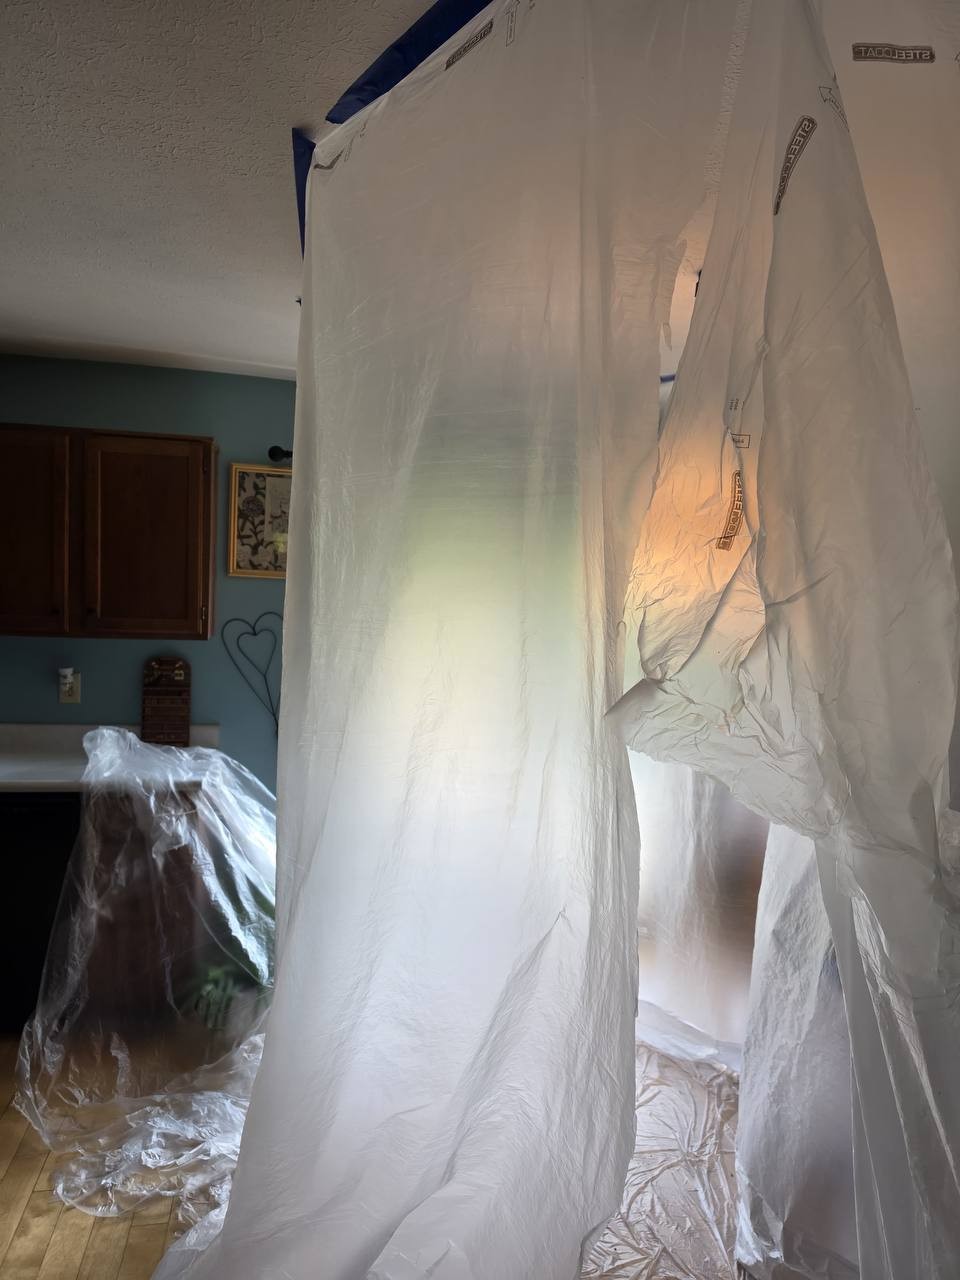
Step 1: Isolate the work zone before sanding starts
Containment setup happened before any finish sanding or texture blending. We used full-height plastic barriers to separate the active zone from adjacent spaces, floor protection to manage traffic paths, and fixture wrap to reduce cleanup risk at the ceiling line. This setup does two things: it limits dust travel and gives the crew a controlled environment to maintain finish consistency.
For homeowners, this is the part worth asking about in every quote: what does dust prep look like, and where does cleanup happen each day? If that answer is vague, the final cleanup usually becomes your problem. On this job, the containment line and daily reset were clear from day one, which kept the rest of the house functional while work moved forward.
Step 2: Build the ceiling finish flat before pattern matching
Texture matching only works when the substrate is right. If the repaired area is proud, dipped, or abrupt at the edge, no texture pattern can hide it under paint. The ceiling area was finished to plane first, then blended out so transitions sat quieter across the surrounding surface. Only after that did we run texture matching passes.
That sequence matters because ceiling lighting exaggerates defects. A surface that looks fine under general room light can still flash under angle light or fixture throw. Wider blend logic and edge control usually decide whether a repair disappears or announces itself after the painter is done.
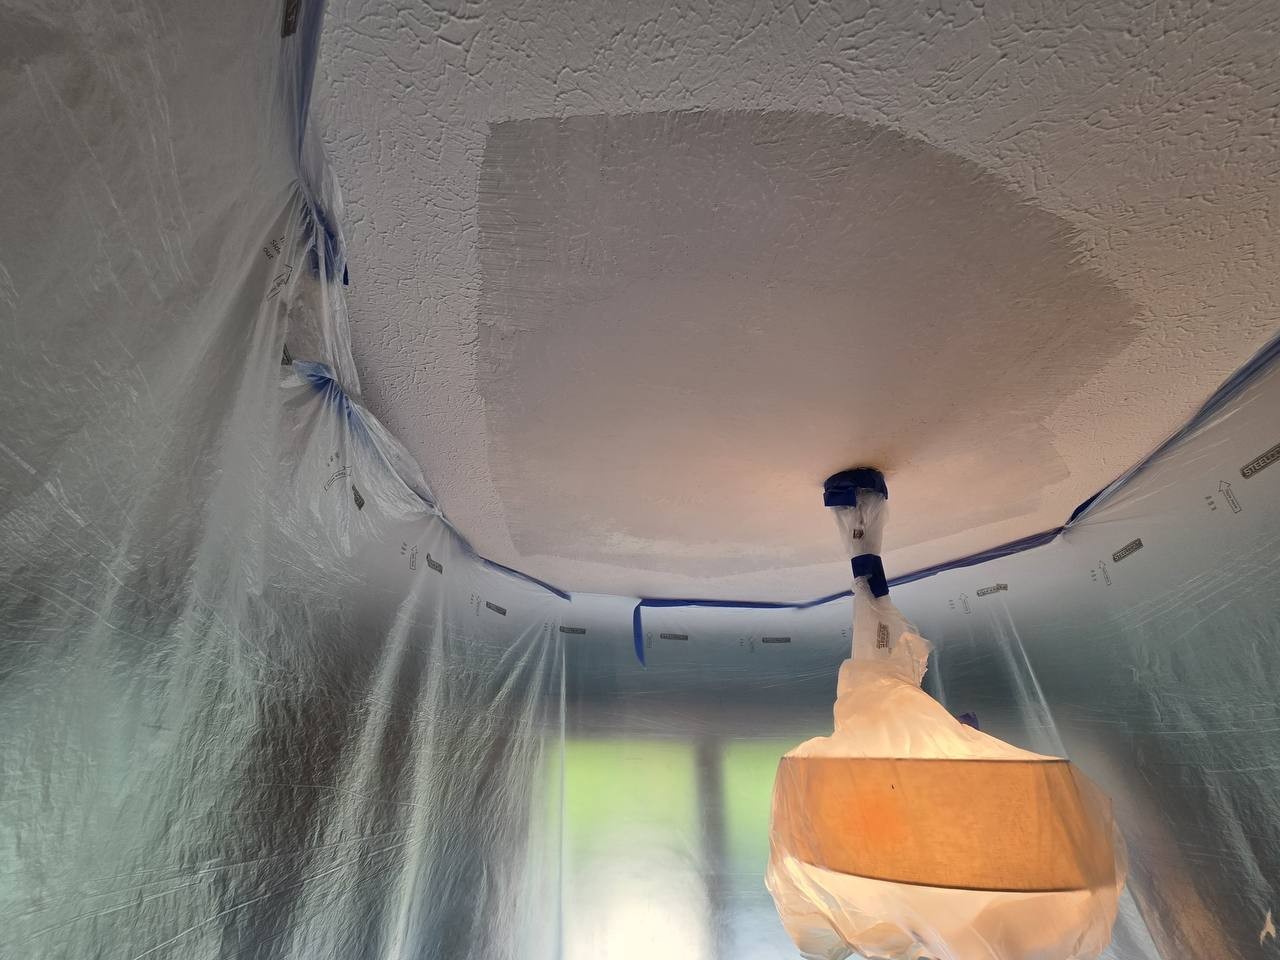
Step 3: Handoff quality = painter-ready, not "hope-ready"
Painter-ready means the drywall side is complete: transitions blended, texture consistency checked, and the surface handed off in a condition that supports a clean primer/topcoat sequence. It does not mean rushing out early because "paint will hide it." Good painters can improve a lot, but they should not be asked to solve drywall shape issues with finish coats.
For this Louisville home, the objective was a straightforward handoff: protected room, matched ceiling texture, and a surface ready for paint without surprise callbacks. That is the standard we aim for on similar occupied-home repair scopes across Louisville and Southern Indiana.
What homeowners can do before quote day
If you are lining up a ceiling repair and texture match, send both wide and close photos. Wide photos help with access, fixture layout, and containment planning. Close photos help with pattern identification and blend strategy. Include ceiling height and whether the room stays in use during work. Those details improve quote accuracy and help the schedule stick.
If paint timing is tight, mention that up front. Drywall finishing and texture blending are schedule-sensitive. Matching the room's pattern and drying window is more important than forcing a same-day paint handoff that creates visible finish issues later.
Bottom line
This project came down to doing the basics at a high standard: contain the zone, protect what matters, finish the ceiling flat, match texture with intent, and hand off ready for painter. That process is repeatable — and it is usually what separates a clean-looking repair from one that still catches your eye after repainting.
Need this same scope for your home? Send us your room photos and project details. We’ll reply with a practical written quote for dust-managed drywall repair and a painter-ready finish.
Louisville dust-control and texture-match FAQs
How do you contain drywall dust in an occupied home?
We isolate the work zone with plastic barriers, protect floors and nearby surfaces, control sanding, and clean daily so dust stays managed in the active work area.
Can ceiling texture really be matched before paint?
A close match is achievable when the patch is finished flat first, the texture pattern is tested, and the blend is checked before final paint.
Why does a patch look different after painting sometimes?
Differences usually come from edge buildup, mismatched texture density, lighting angle, or paint sheen. Wider blend zones and primer checks help prevent that.
What does painter-ready mean on a drywall ceiling?
Painter-ready means the drywall and texture are complete, transitions are blended, fixtures are protected/cleared, and the surface is ready for primer and topcoat sequencing by the painter.