Shelbyville remodels often look straightforward at first: a ceiling patch after a light move, a lower-wall repair after plumbing work, a stairwell ding from material traffic, or a room opened up during a kitchen update. The hard part is not only closing the hole. The hard part is making the repair stay quiet after primer, paint, and real room light.
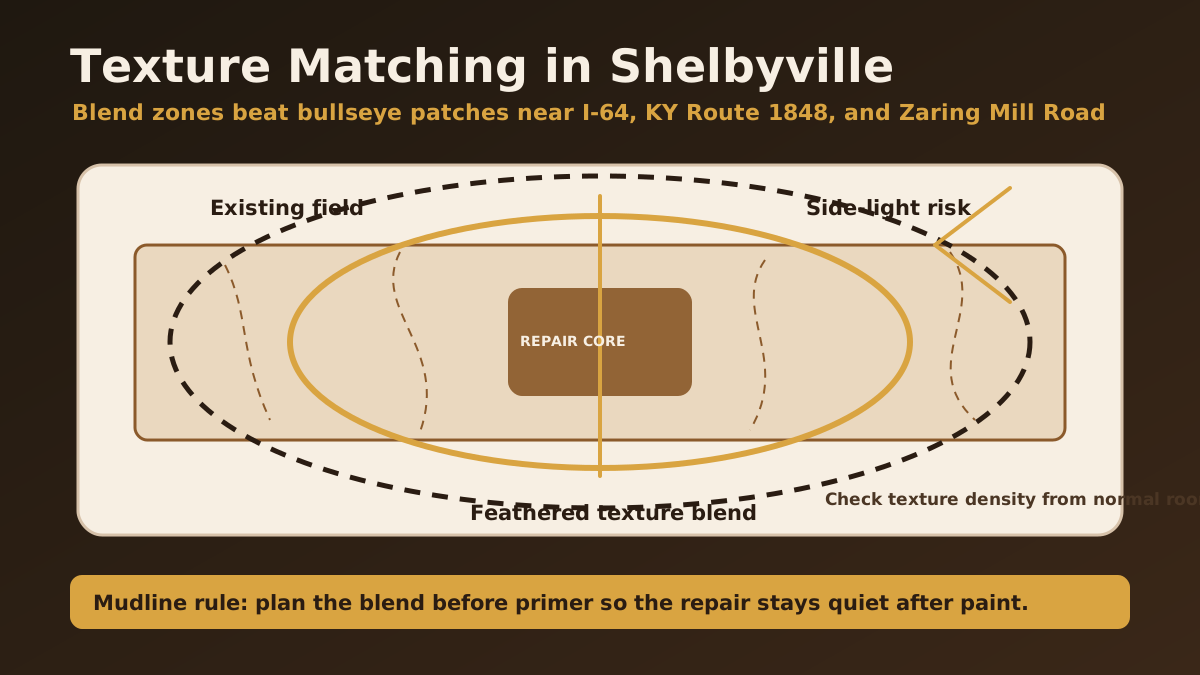
Texture matching is where many drywall repairs either earn trust or advertise themselves. A patch can be flat, strong, and technically complete while still catching the eye because the orange peel is too sharp, the knockdown is too heavy, or the smooth-wall feather stops too close to the repair. In Shelbyville homes near I-64, KY Route 1848, Zaring Mill Road, and older neighborhoods around 40065, the best results come from planning the blend zone before the first coat dries.
Why texture matching is a separate skill
Drywall repair has two jobs. First, it has to restore the wall or ceiling so the surface is solid, stable, and ready for finishing. Second, it has to match the surrounding field closely enough that normal room light does not call attention to the repair. Those are related jobs, but they are not the same job.
A small patch with a tight mud edge can look fine under work lights. Once paint sheen, window light, and hallway sightlines enter the picture, that same patch can show as a bullseye. The surface may be smooth, but the texture density changed too abruptly. That is why Mudline treats texture matching as a finish-planning step, not an afterthought sprayed on at the end.
Start with the existing surface, not the patch
The existing wall decides the repair strategy. Older orange peel may be softer from paint buildup. Knockdown can vary from room to room depending on the original applicator, tool pressure, and how many times the wall has been painted. Smooth walls still have sanding profile, primer behavior, and subtle roller texture. If the repair plan ignores those conditions, the new work may be cleaner than the surrounding wall in a way that still looks wrong.
Before choosing a texture method, look at the field from three distances: close enough to see texture shape, arm's length to see density, and normal room-entry distance to see whether the eye catches transitions. This simple habit keeps the project focused on what the homeowner will actually see.
Blend zones beat tight repair edges
The most common mistake is keeping the texture correction too close to the damaged spot. A tight patch saves a few minutes early and often costs time later. On a visible wall, the repair needs a core where board and compound work happen, a feather zone where the finish transitions, and an existing field that remains undisturbed. The size of that feather zone changes based on texture type, lighting, and paint sheen.
For a lower-wall patch behind a sofa, the blend may stay modest. For a dining room wall that catches side light from a window, it may need to widen significantly. For a ceiling repair in an open living area, the transition may need to follow a natural break or broad field instead of stopping around the hole. The decision should be made by visibility risk, not by the minimum square footage of damage.
Side light is the real test in Shelbyville remodels
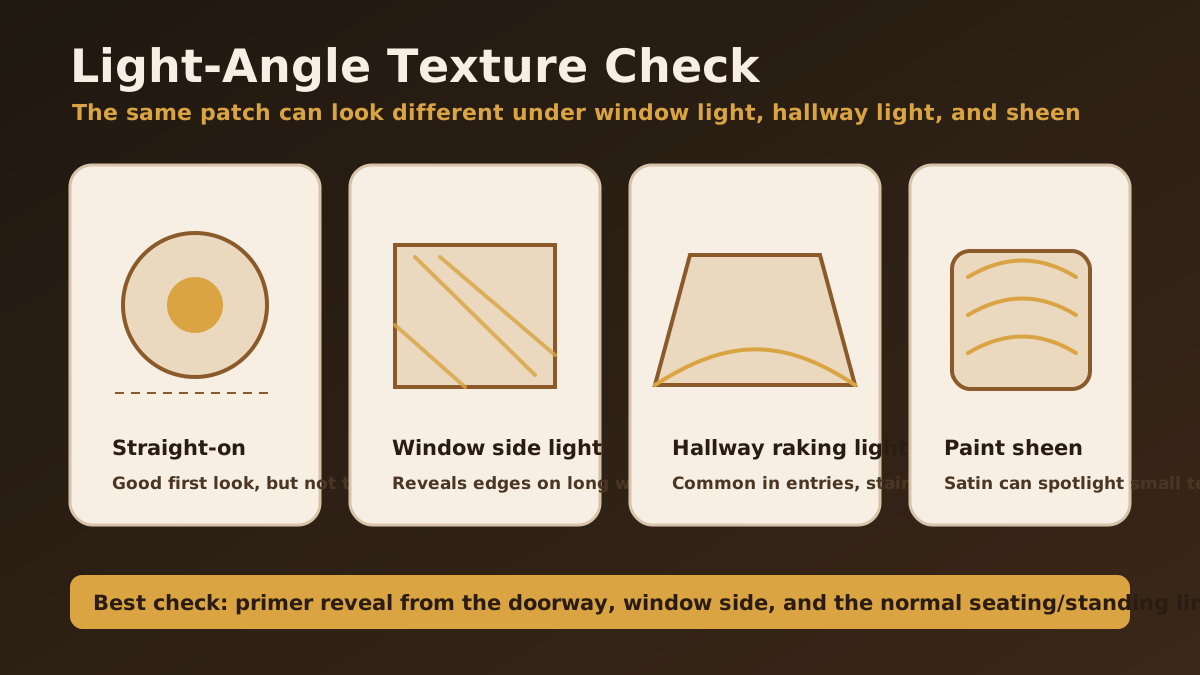
Many Shelbyville homes have rooms where daylight slides across long walls in the morning or late afternoon. Open kitchen remodels, hallways, stair walls, and living rooms with larger windows can all create raking light. That light is unforgiving. It reveals texture height, sanding scratches, compound edges, and roller-pattern changes faster than direct overhead light.
If a repair will live under side light, the estimate and schedule should account for a stronger quality-control pass. That may mean a broader skim, a texture mockup, or a primer reveal before final paint. It may also mean explaining that the best repair is not always the smallest repair. A slightly larger blend area can be the responsible choice when it prevents a visible patch outline.
Orange peel, knockdown, and smooth wall all behave differently
Orange peel texture depends on droplet size, spacing, and how heavily the wall has been painted over time. A new spray pattern can look too crisp next to older softened texture. Matching often requires dialing down the spray, adjusting distance, or using a test piece before applying texture to the repair.
Knockdown adds another variable: timing. If the material is knocked too early, the pattern can smear flat. If it is knocked too late, it can stand proud and heavy. The existing wall may have wide islands, tight islands, or mixed pressure marks. A good match studies that pattern before applying new material.
Smooth walls are not automatically easier. They reveal feather edges, sanding direction, and sheen changes. Level 4 work can be appropriate for many repaints, while critical-light areas may need a broader skim or a Level 5-style approach. The right call depends on room use, lighting, and final paint expectations.
Moisture and substrate checks come before cosmetics
Texture cannot solve an unstable substrate. If a patch follows a roof leak, plumbing repair, condensation issue, or prior water event, the source and dry condition have to be addressed first. Otherwise the surface may fail, stain, or move after the cosmetic repair is complete.
A practical check looks for soft board, loose paper, fastener movement, active staining, and cracked compound around the damaged area. If the board is compromised, a proper cutout is better than trying to bury the issue under mud. Once the substrate is stable, then texture matching has a fair chance to hold up.
What photos help a texture-matching quote
Good photos make a written quote more accurate. Send one straight-on image of the full wall or ceiling, one closer photo of the damage, and one angled photo that shows how light crosses the surface. If the repair is near trim, cabinets, a window, or a doorway, include those edges so the blend strategy can be judged honestly.
Location details help too. Notes like “near Zaring Mill Road,” “close to I-64,” “off KY Route 1848,” or “Shelbyville 40065” help with route planning and schedule windows. Mention whether the room is occupied, whether furniture can be moved, whether final painting is already scheduled, and whether the surface has been patched before.
Primer reveal should be part of the handoff
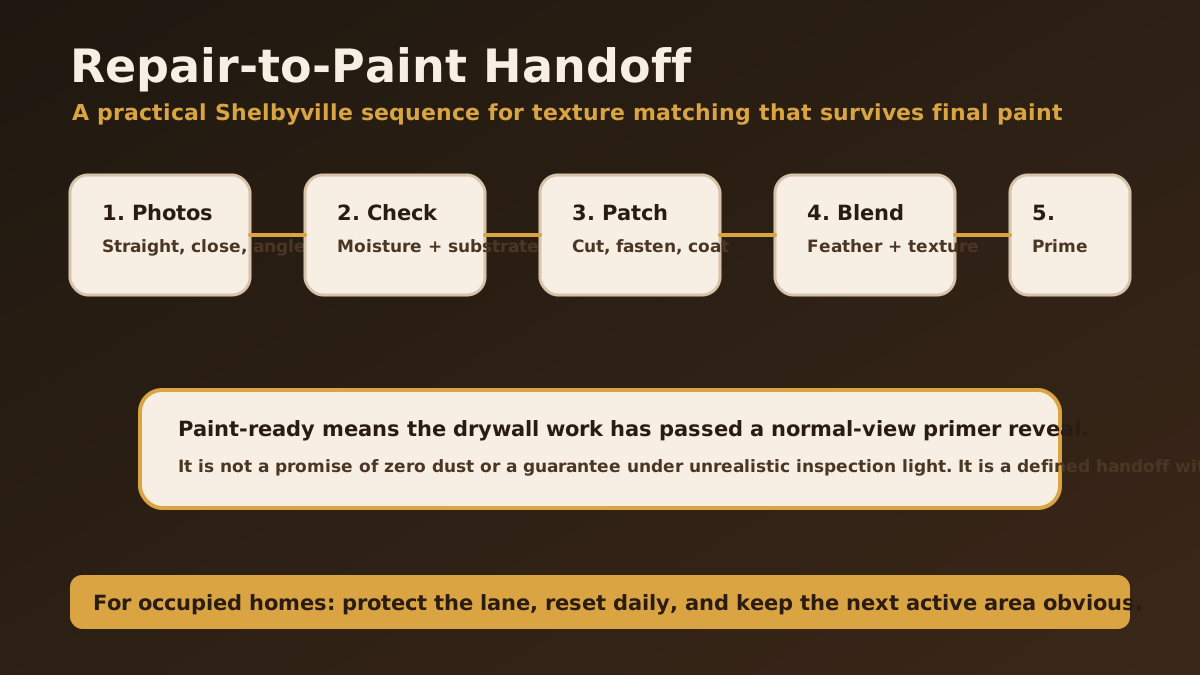
Primer reveal is the checkpoint where texture matching becomes visible before final paint locks it in. Fresh compound and fresh texture can hide small issues because the surface is not uniform yet. Primer creates a more honest view. It can show a feather edge, a texture-density shift, or a sanding mark while there is still time to correct it efficiently.
The key is to inspect from normal use positions. Stand at the room entry. Look from the main seating area. Check the wall from the window side if that is where light runs across it. A repair that passes those views is far more meaningful than one that only looks good under a bright work lamp held straight on.
If a patch will be painted with satin or another higher-sheen finish, plan the blend area more conservatively. Sheen makes small surface changes easier to see.
Dust control matters, but drywall is still dusty
Drywall is a dusty process — we do not pretend otherwise. Sanding, cutting, and texture work create fine dust even on well-managed projects. The honest goal is to minimize spread with containment, protected floors, controlled travel lanes, and daily cleanup resets.
In occupied Shelbyville homes, dust planning should be practical. Decide which route materials and debris will use. Protect the path before work starts. Keep tools staged in one predictable area. At the end of the day, reset the space so the homeowner knows what is active, what is drying, and what comes next. That discipline protects trust as much as it protects floors.
How remodel timing affects texture quality
Texture matching often gets squeezed at the end of a remodel schedule. Cabinets are coming, painters are booked, flooring is protected, and everyone wants the room back. But rushing texture can create visible differences that are harder to fix after finish paint. A better schedule gives compound, texture, primer, and review each enough room to work properly.
For builders and remodelers, the drywall handoff should identify the intended finish standard, known critical-light areas, texture type, and who owns final painting. Clear notes prevent the last trade in the room from being asked to solve decisions that should have been made earlier.
Shelbyville drywall texture matching FAQs
Can drywall texture be matched exactly in Shelbyville homes?
Often it can be matched closely enough to stay quiet in normal room light, but exact duplication depends on age, paint buildup, texture type, and lighting. The blend zone matters as much as the texture tool.
Why do drywall patches show after painting?
Patches usually show because texture density, feather edges, sanding profile, or paint sheen changed at the repair. Primer reveal and side-light checks help catch those issues before final paint.
Does a small patch always mean a small blend area?
No. A small repair in a high-visibility wall may need a wider feathered blend so the transition does not create a bullseye after paint.
Does Mudline serve Shelbyville and nearby Shelby County?
Yes. Mudline serves Shelbyville, Simpsonville, Louisville, St. Matthews, Middletown, La Grange, and nearby communities for drywall repair, finishing, installation, and texture matching.
Final takeaway
Strong drywall texture matching in Shelbyville starts with the existing surface, not just the hole. Plan the repair core, feather the blend zone, inspect under side light, and use primer reveal before calling the surface paint-ready. That process gives remodel patches a better chance to disappear in the way that matters: from normal room views after the room is back in use.
Need drywall texture matching in Shelbyville or nearby Shelby County? Send photos and room details and Mudline will provide a written quote within one business day.