Water-damage drywall repair in New Albany is not just a patching problem. The visible stain or soft board is usually the last sign of a longer story: a plumbing leak, roof edge issue, tub overflow, appliance line, condensation problem, or exterior water path that needs to be understood before the wall is closed. If the source is still active or the board is still damp, new compound and paint only hide the problem for a short time.
For homes around Spring Street, Charlestown Road, downtown New Albany, and neighborhoods with quick access to I-64, the right repair sequence starts with moisture control and ends with a clean paint-ready handoff. This guide explains how to think through cutouts, drying time, texture matching, and finish checks so a water-damage repair does not turn into a repeat callback.
Start with the source, not the stain
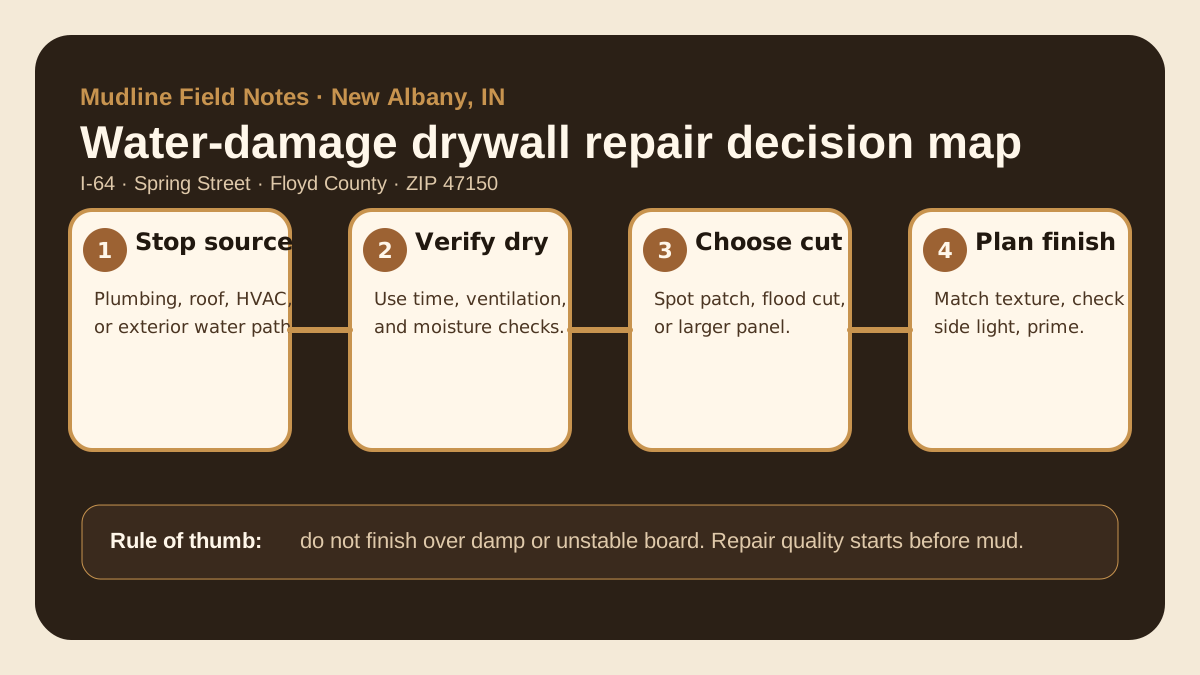
The biggest mistake in water-damage drywall work is treating the stain as the scope. A brown mark, bubbling tape line, or soft lower wall tells you where water showed up, not necessarily where it started. In New Albany homes, common sources include supply-line leaks, tub or shower overflow, roof seepage after storms, foundation-wall moisture, and appliance connections near utility rooms.
Before repair begins, the source needs to be stopped or at least clearly diagnosed. If water is still moving, fresh board can wick moisture into new seams. If the source is intermittent, the repair may look fine during the first week and then fail after the next heavy rain or plumbing use. That is why good drywall repair starts with practical investigation, not with mud.
How dry is dry enough?
Drying time depends on the source, material thickness, airflow, and how long the water sat inside the assembly. A small splash that was caught immediately may dry quickly. A slow leak behind baseboard or a damp lower wall near a basement stair can require more caution. The goal is not to wait randomly; the goal is to confirm the board, framing edge, and surrounding material are stable enough to finish.
On a quote or walkthrough, useful clues include whether the area still feels cool, whether paint is blistering, whether base trim has swelling, and whether the stain changes after rain or fixture use. Photos help, but moisture history matters too. A homeowner who can explain when the issue started, what changed, and whether the source has been repaired gives the drywall team a better chance of scoping the repair correctly.
Spot patch, flood cut, or larger panel replacement?
Not every water-damaged area needs the same cutout. A clean spot patch may be appropriate when the affected board is small, dry, and structurally sound. A flood cut makes sense when lower-wall damage is continuous or when the bottom section needs removal for drying and access. Larger panel replacement may be the better call when seams would otherwise land in bad locations, when texture transition risk is high, or when damage spreads behind cabinets, trim, or multiple studs.
The cut line should be chosen for both moisture control and finish quality. Cutting only around the visible stain can leave weak paper edges and awkward seam placement. Cutting to a straight line, stud-backed edge, or natural transition often creates a better repair even if the opening is slightly larger. The repair has to work technically and visually.
Texture matching after water damage
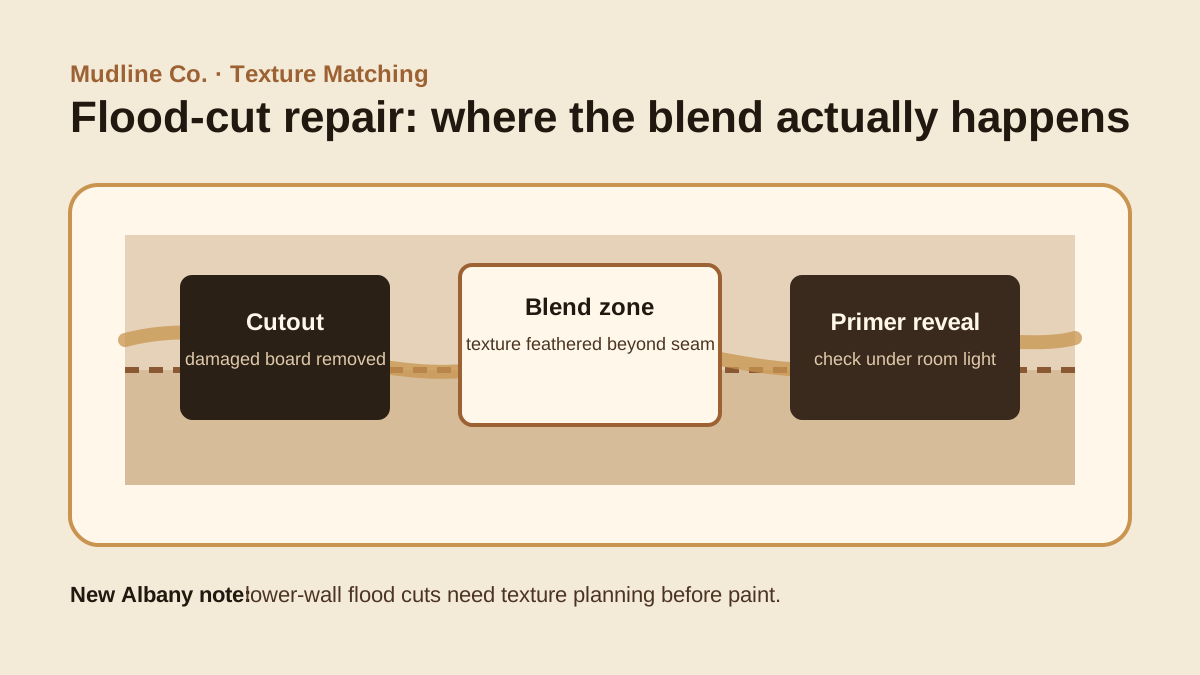
Water-damage repairs often happen on walls that already have older texture, multiple paint layers, or prior patch history. That makes texture matching a separate planning step. Orange peel, knockdown, and lightly textured wall fields all behave differently around a new cut line. Even smooth walls can reveal patch edges when side light crosses the repair.
The best texture plan starts before final sanding. The repair team should decide where the blend will feather out, how the existing texture density changes across the wall, and which angles matter most in normal use. A lower wall in a hallway, stair landing, or living room sightline will usually need a broader blend than a hidden utility space. The goal is a repair that stays quiet after primer and paint, not one that only looks good while compound is fresh.
Why primer reveal matters
Primer reveal is a quality-control step that catches problems before finish paint locks them in. Fresh compound can hide slight texture differences, sanding scratches, and feather edges. Primer changes the surface sheen and often makes those issues easier to see. That is a good thing when it happens before final paint.
For New Albany drywall repairs, primer reveal should be checked from normal room-entry angles, not just straight on from two feet away. If the repair is near a window or long wall, check it under side light. If the room uses eggshell or satin paint, be more cautious because sheen can make small transitions more visible. A good handoff identifies whether a remaining item is a drywall correction, a paint-prep item, or simply normal wall variation.
Dust and containment expectations
Drywall is a dusty process — we do not pretend otherwise. Water-damage repairs can be especially messy because damaged board removal, insulation checks, sanding, and cleanup all happen in a confined area. The honest goal is controlled dust, not a promise that the home will look untouched during the work.
Plastic barriers, floor protection, protected travel lanes, and daily cleanup resets make a meaningful difference. In occupied homes, it helps to define which door, hallway, or stair route will be used for debris and material movement. When the work area is near a kitchen, bedroom, or main bath, that containment plan should be part of the schedule discussion, not an afterthought.
What homeowners should photograph before requesting a quote
Good quote photos reduce guesswork. Take one straight-on photo of the full wall, one closer photo of the damage, and one angled photo that shows lighting across the surface. If the issue is near baseboard, include the floor line and nearby trim. If the leak came from above, include the ceiling, fixture, or room above if it helps explain the source.
Also share the ZIP code and the nearest useful landmark or route. For New Albany, details like “near Spring Street,” “off Charlestown Road,” “close to I-64,” or “in 47150 near downtown” help with routing and scheduling. Add whether the source has been fixed, whether insurance is involved, and whether the area is currently dry to the touch.
When insurance affects the drywall scope
Some water-damage repairs are simple homeowner-paid fixes. Others involve insurance documentation, mitigation work, or a restoration company that has already removed material. When insurance is involved, drywall scope needs to align with what has been approved, what remains open, and what finish level the room needs after reconstruction.
It is worth separating mitigation from finish repair. Mitigation focuses on stopping damage and drying the structure. Drywall repair focuses on rebuilding the wall, matching surface conditions, and preparing for paint. When those scopes are blurred, expectations get messy. A clear written quote should identify board replacement, finishing, texture matching, cleanup expectations, and what is not included, such as plumbing repair or final painting if those are handled by others.
Scheduling around drying and daily life
Water-damage drywall cannot always be rushed into a single visit. Drying, compound coats, sanding, texture, and primer checks may require staged visits. That does not mean the project has to feel open-ended. A practical schedule should explain what happens first, what must dry, when sanding or texture work will occur, and when the area is ready for paint.
For busy New Albany households, the daily close matters. Tools should be staged tightly, debris removed, and the next active area explained before the crew leaves. A simple end-of-day reset keeps the home usable and makes the next phase more productive.
Builder and property-manager considerations
For rental turnovers, remodel punch lists, and builder warranty items, water-damage drywall repair needs fast communication. The most useful scope notes are simple: room, source status, cutout dimensions, finish expectation, texture type, paint responsibility, and access window. Those details prevent the drywall crew from arriving without the information needed to finish efficiently.
Property managers should also document whether the wall has repeated moisture history. If the same area has been patched more than once, the drywall surface may be telling you that the underlying problem has not been solved. Repeating a cosmetic repair without source correction is rarely a good use of the budget.
New Albany water-damage drywall FAQs
Can water-damaged drywall be patched without replacing the whole wall?
Yes, if the source is stopped, the board is dry and stable, and seams can be placed cleanly. Larger cutouts are better when damage is continuous or texture blending needs room.
How long should drywall dry before repair in New Albany homes?
Drying time depends on water source, airflow, materials, and how long moisture sat inside the wall. Repair should wait until the area is stable and dry enough to finish.
Do flood-cut drywall repairs need texture matching?
Usually, yes. A flood cut creates a long seam and a new lower-wall surface, so the texture blend should be planned before primer and paint.
Does Mudline serve New Albany and nearby Southern Indiana?
Yes. Mudline serves New Albany, Jeffersonville, Clarksville, Sellersburg, Floyds Knobs, and nearby Southern Indiana communities for drywall repair and finishing.
Final takeaway
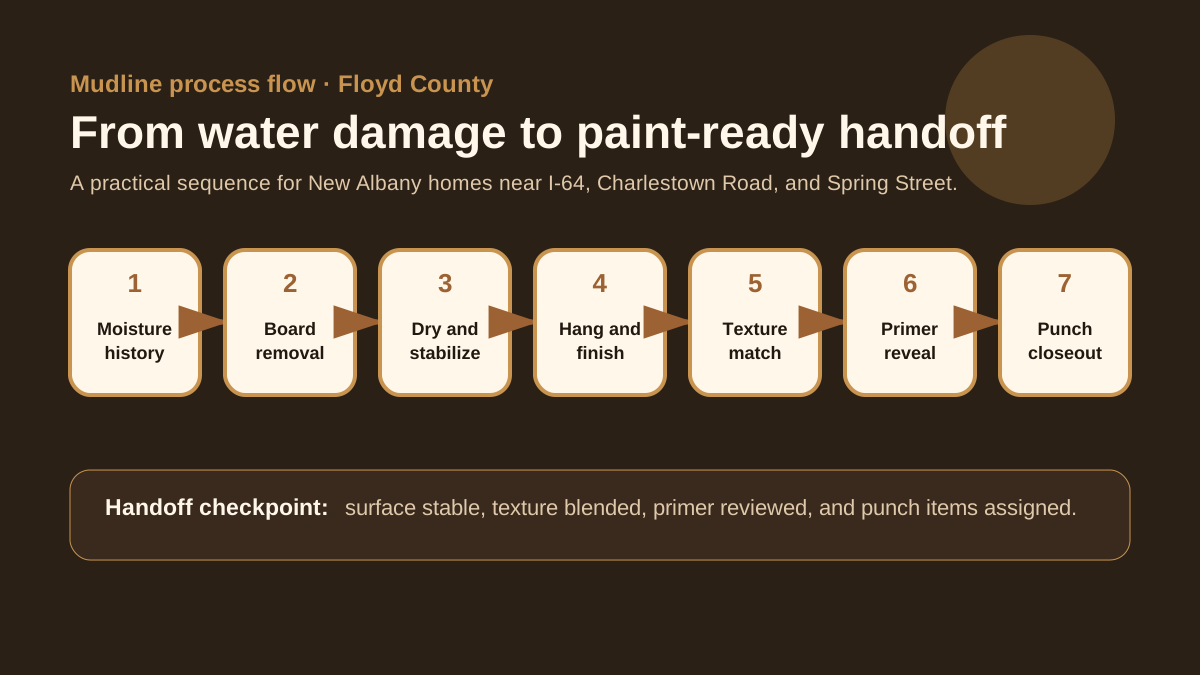
Strong water-damage drywall repair in New Albany follows a disciplined sequence: stop the source, verify dry conditions, choose a smart cut line, rebuild stable board, match texture, review under primer, and close out with clear punch responsibility. That process protects both finish quality and homeowner trust.
Need water-damage drywall repair in New Albany or nearby Southern Indiana? Send photos and source details and Mudline will provide a written quote within one business day.