Historic drywall repair in Jeffersonville is rarely just a square patch. Older homes near Spring Street, Court Avenue, Wall Street, and the riverfront often have mixed wall systems: original plaster in one room, drywall from a later remodel in another, and a few mystery repairs hiding under paint. That mix is normal for Southern Indiana houses that have been updated in layers. It also means the best repair plan starts with diagnosis, not a knife.
Current repair calls across the Louisville and Southern Indiana market are trending toward practical, occupied-home work: owners want water stains checked after heavy weather, old cracks stabilized before repainting, and texture blends that do not announce themselves under modern LED lighting. The building trend behind that is simple. More homeowners are improving what they already own, and older properties need repairs that respect existing surfaces instead of treating every wall like new construction.
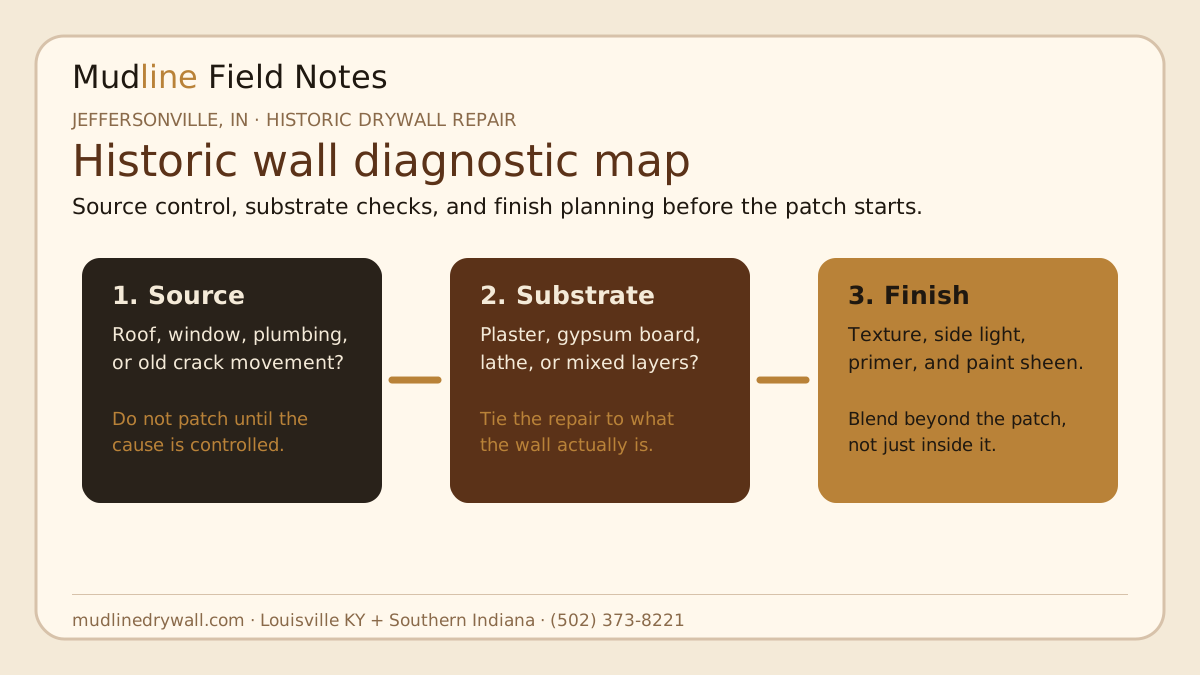
Start by finding the reason the wall failed
A crack in an older Jeffersonville wall can come from normal settlement, door-frame movement, past water intrusion, a roof or window leak, plumbing, or a previous repair that was never tied in correctly. Those causes do not all receive the same fix. A cosmetic skim over an active moisture problem is not a repair; it is a delay. A small patch over a moving joint can open again after the first seasonal swing.
Before the finish plan, look for clues. Staining near a ceiling line points toward roof, flashing, gutter, or upstairs plumbing history. Soft board near base trim can point toward old moisture or repeated condensation. Diagonal cracks near door corners can point toward framing movement. Hairline cracks across broad plaster fields may need a different approach than a clean drywall impact hole. The repair should match the failure pattern.
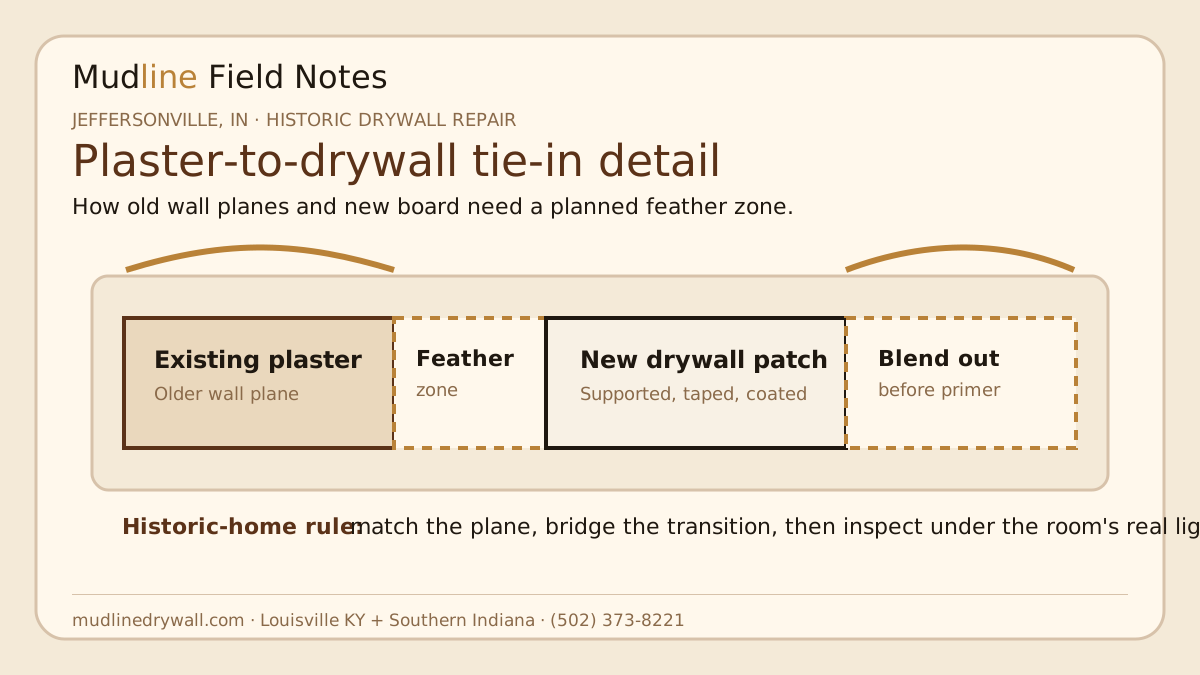
Plaster-to-drywall tie-ins need a broader blend zone
Many historic houses have at least one place where new drywall meets older plaster. That seam can become visible because the two materials behave differently. Plaster may be thicker, harder, slightly wavy, or built over lathe. Drywall is flatter and more uniform. If a patch only fills the damaged square, the finished wall can show a picture-frame edge once primer hits it.
The better approach is to plan a tie-in. That means creating a solid edge, backing the repair properly, taping the transition, and feathering compound beyond the immediate patch so the old and new planes meet gradually. On a smooth wall, that feather zone may need to be wider than the hole itself. On a textured wall, the blend zone needs enough room to fade pattern density so the patch does not look like a stamp.
Moisture checks matter before any mud work
Jeffersonville homes close to mature trees, older rooflines, and river weather patterns can see leaks that are already fixed by the time the drywall contractor arrives. That does not mean the board is ready. If the surface is still damp, compound and primer can fail. If stained material remains unstable, the finish may flash, blister, or smell musty later.
Water-damage repair should follow a clear sequence: confirm the source is controlled, verify dry conditions, remove compromised board or loose plaster, rebuild with stable backing, then plan stain blocking and finish. For insurance-related or storm-related work, photos before demolition and after cutout can also help document why the scope was necessary. That record protects both the homeowner and the contractor.
If a stain looks dry but the room has a recent leak history, do not rush straight to texture. Ask what was fixed, when it was fixed, and whether the wall or ceiling has been checked under normal room conditions.
Texture matching is about light, not just pattern
Texture matching in older Jeffersonville homes is tricky because the visible result depends on where people stand. A repair can look acceptable straight on and still show from the hallway, stair landing, or window side. That is why good texture matching looks at pattern type, pattern density, edge fade, and light direction together.
Orange peel, light knockdown, old roller texture, and hand-applied repairs all reflect light differently. Even smooth walls have a texture: the paper field, compound field, sanding marks, and primer absorption create subtle differences. If a room uses higher-sheen paint or has LED cans close to the ceiling, the texture plan needs to be more conservative. Wider blending and a primer reveal check often prevent late surprises.
Occupied homes need honest dust control
Historic repair work often happens while the homeowner is living in the house. Drywall is a dusty process — we do not pretend otherwise. The right expectation is dust controlled, not dust-free. Plastic barriers, floor protection, sealed work paths, and daily cleanup keep the project manageable, but sanding and demolition can still leave some fine dust around the work zone.
This matters more in older homes because access can be tighter. Stairways may be narrow. Trim may be fragile. Rooms may have furniture that cannot easily leave the space. A realistic repair plan should define where tools stage, where dust barriers go, which rooms need protection, and how the area will be reset at the end of each workday. That planning is part of the job, not an afterthought.
When a small patch should become a larger repair
Homeowners often ask why a drywall contractor wants to open more than the visible damaged spot. Sometimes the answer is structural support. A clean patch needs backing and a stable edge. Sometimes the answer is moisture or loose material. If the surrounding board is soft or plaster is detached, stopping at the stain line leaves weak material in place. Sometimes the answer is finish quality. A larger feather zone may be the only way to make the repair disappear after paint.
That does not mean every repair should grow. It means the scope should explain the reason. A good quote separates the damaged core from the blend area. The core is where material is removed or rebuilt. The blend area is where finish work extends so the wall reads as one surface. That distinction helps customers understand why a six-inch crack may require a wider finishing area.
Paint-ready does not always mean paint-perfect
Paint-ready means the drywall repair is finished, sanded, cleaned, and ready for primer or paint according to the agreed scope. It does not mean the rest of the historic wall suddenly becomes new. Older walls may still have waviness, prior repairs, trim shadow, or plaster character outside the repair zone. This is where expectation setting matters.
Before paint, inspect the repair under the light that actually affects the room. If the wall looks worst in late afternoon from the front window, check it then when possible. If hallway lighting reveals the ceiling patch, inspect from that path. Primer is a useful checkpoint because it reveals absorption differences before the final color locks them in. A short painter handoff can save a long punch list.
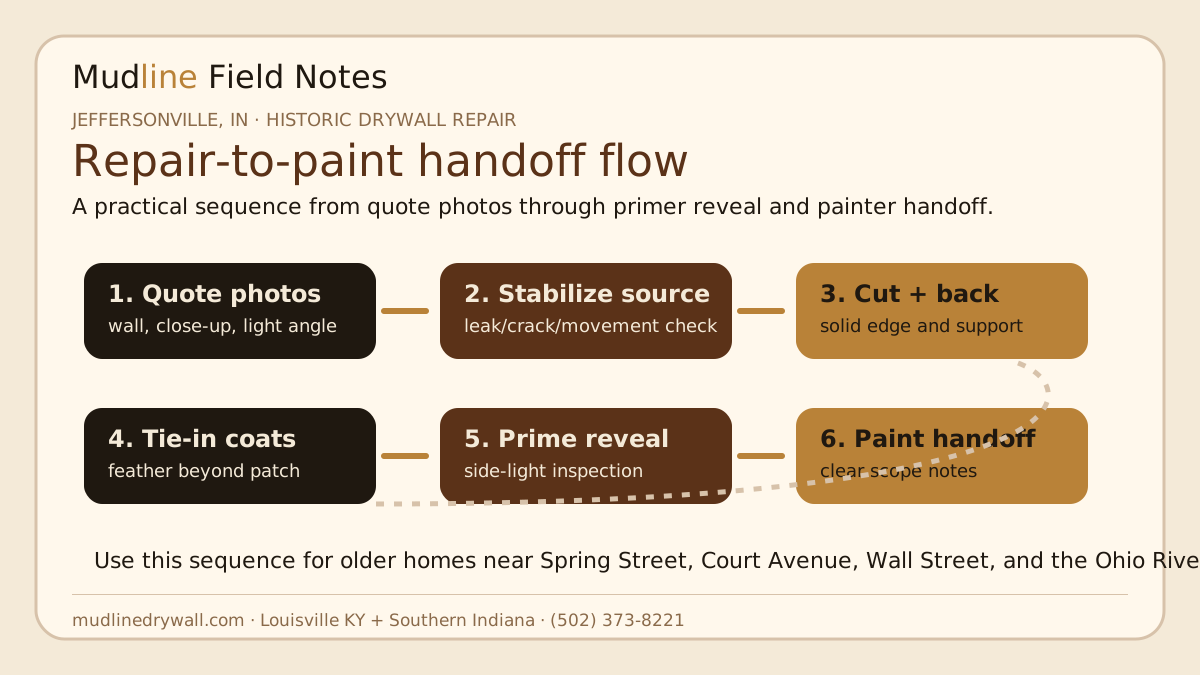
What to send for a better Jeffersonville drywall quote
Good quote photos help define the right repair before anybody visits. Send one wide photo of the room, one medium photo showing the damaged area and nearby corners or trim, one close photo of the crack or stain, and one angle photo showing how light crosses the wall. If the issue is water-related, include what was fixed and when. If the home has plaster, mention whether the wall feels hard and solid or hollow and loose when tapped lightly.
Local details help too. A house near downtown Jeffersonville may have different access constraints than a newer home closer to Veterans Parkway. Parking, stairs, ceiling height, occupancy, pets, and painter dates all affect the work plan. The goal is not to make the customer do the contractor's job. The goal is to quote the repair with fewer surprises.
Jeffersonville historic drywall repair FAQs
Can drywall be patched into old plaster walls?
Yes, but the transition needs proper backing, tape, compound, and a wider feather zone so the new drywall and older plaster plane blend after primer and paint.
Should water-stained drywall be patched right away?
No. The source should be controlled and the area should be verified dry first. Patching over damp or unstable material can lead to staining, blistering, odor, or repeat failure.
Why do old wall patches show after paint?
Patches show when texture density, surface plane, primer absorption, or side light differs from the surrounding wall. Older plaster-to-drywall transitions need wider blending to reduce that risk.
Does Mudline handle small repairs in Jeffersonville?
Yes. Mudline provides drywall repair, plaster-to-drywall tie-in planning, texture matching, and paint-ready patch work for Jeffersonville and nearby Southern Indiana homes.
Final takeaway
Historic drywall repair in Jeffersonville is part detective work and part finish work. Find the cause, respect the existing wall system, build a stable patch, blend beyond the damage, and inspect under real room light before calling it ready for paint. That process takes more discipline than a quick cover-up, but it gives older homes a repair that looks intentional instead of temporary.
Need a historic wall or ceiling repair checked in Jeffersonville? Send photos and project details and Mudline will provide a written quote and repair plan within one business day.