Water-damage drywall calls around Shepherdsville tend to happen after the obvious event is over. A roof leak gets stopped. A supply line is repaired. A window or exterior wall is sealed. Then the homeowner is left with stained board, loose tape, swollen corners, or a ceiling patch that looks small until daylight hits it from the side. The repair can look simple, but the wrong first move can trap moisture, hide damaged backing, or leave a patch that flashes through paint.
This guide is written for homes and light commercial spaces near KY-44, I-65, Brooks, Hillview, and Bullitt County neighborhoods where humidity, crawlspace conditions, roof transitions, and plumbing access all show up in real repairs. The current repair trend we keep seeing is not about fancy materials first; it is about moisture-aware planning, cleaner containment, and smoother post-primer checks. Durable drywall work starts before the first coat of compound.
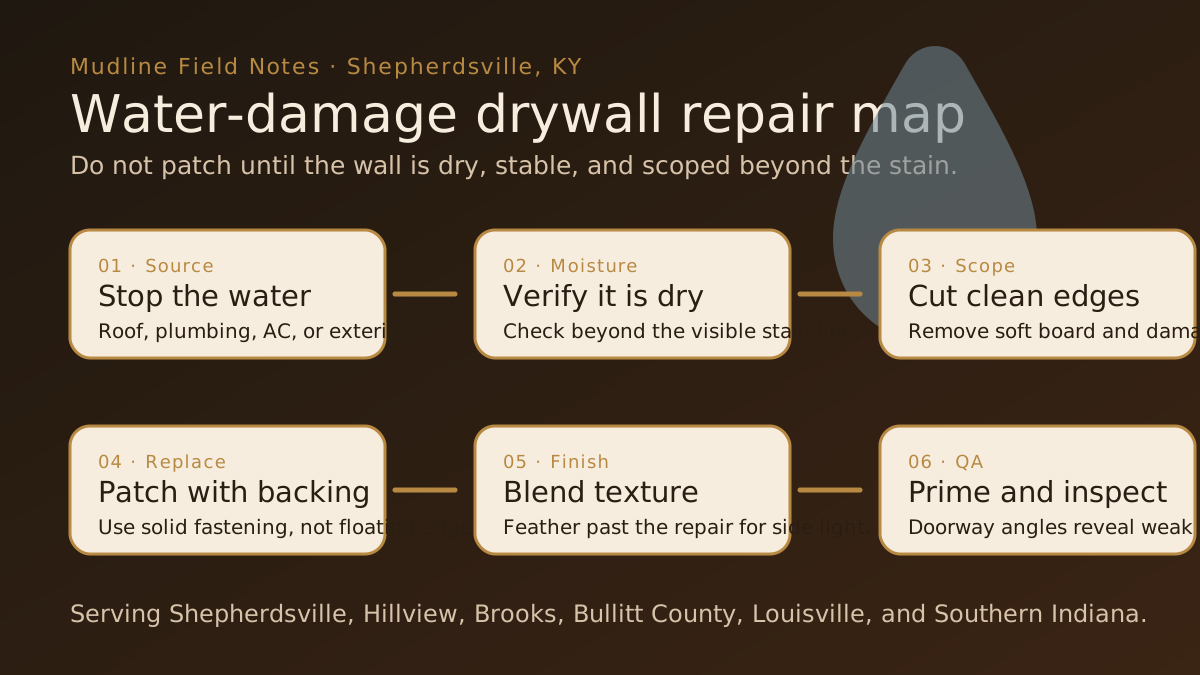
Start with the source, not the stain
The stain is evidence, not the whole problem. Before drywall repair begins, the leak source has to be corrected or confidently ruled out. That might mean a roof transition, a bathroom supply line, an AC condensate issue, an exterior wall penetration, or moisture traveling from a window or basement condition. If the source is still active, any patch becomes temporary.
In Shepherdsville homes, we pay close attention to how water traveled. A ceiling stain under a second-floor bath may point to plumbing, but it can also spread along framing before it shows through. A wall stain near an exterior corner may be local, or it may involve insulation that stayed damp after the room surface felt dry. A good repair scope asks, “What got wet?” rather than “How big is the brown spot?”
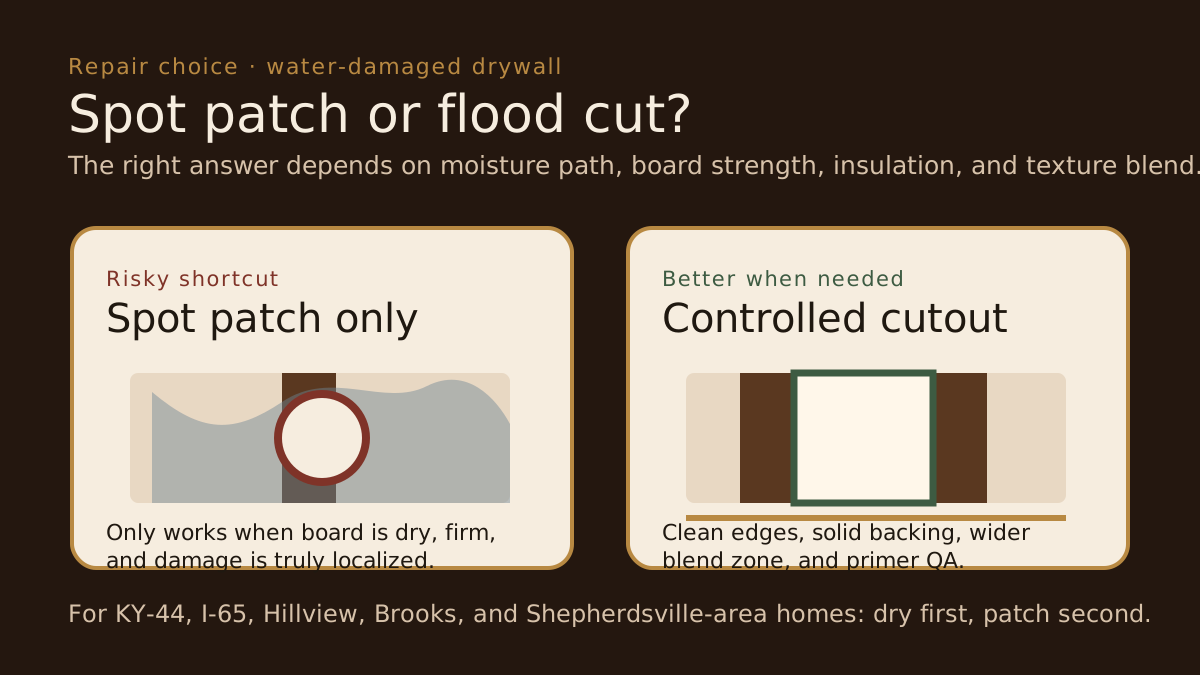
When a spot patch is enough — and when it is not
A spot patch can work when the drywall is fully dry, firm, flat, and only cosmetically stained. That is usually the smaller category. Once board gets soft, paper delaminates, tape releases, fasteners rust, or insulation behind the wall stays damp, a controlled cutout is safer. Cutting back to solid edges feels more invasive at first, but it gives the repair structure and prevents weak material from staying buried under new compound.
Flood-cut style repairs also need judgment. Not every water event requires the same height cut, and not every wall should be opened wider than necessary. The goal is controlled removal: enough to replace compromised board, inspect the cavity, create solid fastening, and give the finish room to blend. That is different from chasing damage randomly across a wall.
Texture matching matters after water damage
Water-damage repairs often show after paint because the texture layer gets treated as an afterthought. Existing orange peel, knockdown, roller stipple, or older paint build has a profile. If the new patch is too smooth, too heavy, or feathered too narrowly, the repair can look fine during sanding and still show under primer. Side light from a hallway, window, or kitchen fixture will find the edge.
For Shepherdsville and Louisville-area homes, the better sequence is to finish the patch flat, test the texture profile, extend the blend zone beyond the board seam, and inspect after primer. Primer is the truth-teller. It reveals sanding scratches, texture mismatch, raised tape edges, and sheen differences before final paint locks them in.
If a water-damage repair is in a hallway, stairwell, bathroom, or kitchen ceiling, inspect it from doorway angles after primer. Those are the same angles guests and buyers will notice first.
Do not skip dust and containment planning
Water-damage drywall repair usually involves cutting, sanding, and sometimes removing compromised material. Drywall is a dusty process — we do not pretend otherwise. On occupied homes, containment matters: plastic barriers, floor protection, controlled work zones, and daily cleanup. You may still see some dust, but a planned setup keeps it managed and helps protect nearby rooms.
Containment is also a schedule issue. If the repair area is a kitchen, hallway, bedroom, or bathroom, access needs to be planned around drying time, compound passes, and family routines. A patch that is rushed because the room was not set up properly can cost more time than doing the preparation correctly.
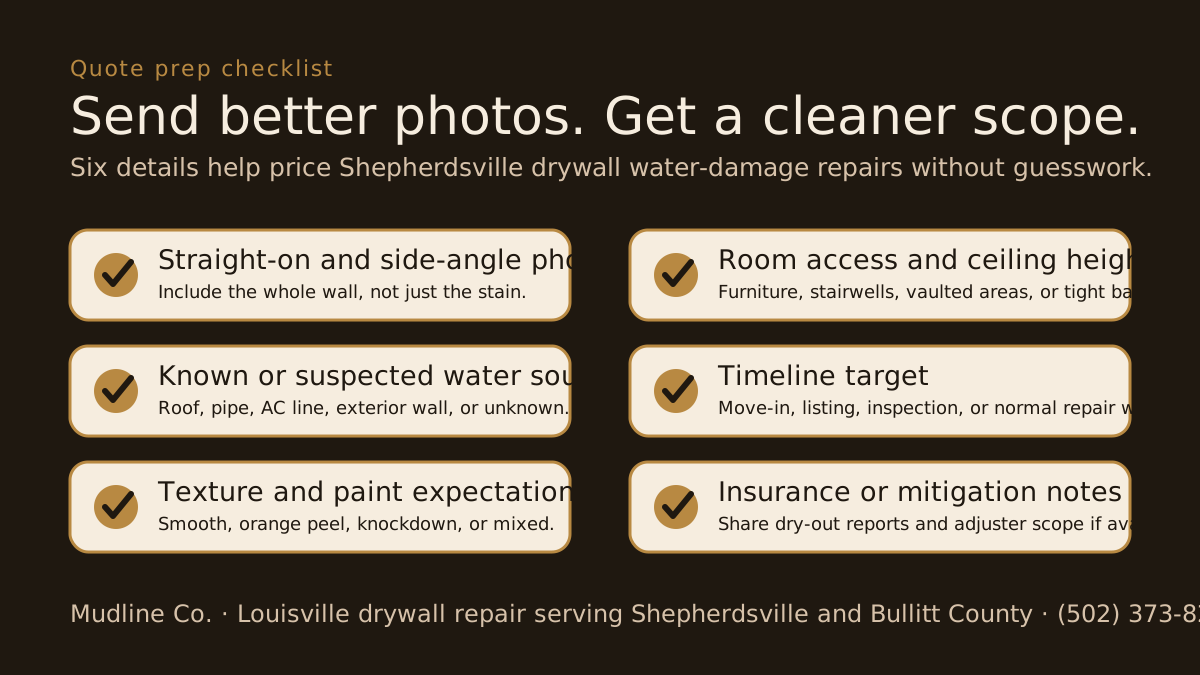
What to send for a written repair quote
The fastest way to get an accurate water-damage drywall quote is to send the right information up front. A close-up photo alone is not enough. Send a straight-on photo of the full wall or ceiling, a side-angle photo that shows lighting, a note about the suspected water source, and whether the area is now dry. If mitigation or insurance documentation exists, include that too.
Also describe the texture. Smooth wall, orange peel, knockdown, heavy roller texture, and older painted surfaces all change the finish strategy. If the space is near a deadline — move-in, listing, inspection, rental turnover, or a repair following mitigation — include that date so drying windows and finish passes can be planned responsibly.
Insurance, mitigation, and drywall scope should line up
If the project involves insurance or a mitigation company, drywall scope should match the actual repair condition. Sometimes mitigation removes board and leaves a clean opening. Sometimes it stops short of the full finish area, which means the drywall quote has to account for both replacement and blending. The finish scope may extend beyond the cut line because the visual repair area is larger than the removed board.
That is where homeowners can get surprised. The “hole” may be two feet wide, but the finish blend may need to run across a broader wall section to keep the patch from reading as a rectangle. A written quote should explain the difference between board replacement, finishing, texture matching, primer checks, and paint-ready expectations.
Local repair considerations around Bullitt County
Shepherdsville sits close enough to Louisville that material availability and crew routing are practical, but local conditions still matter. Homes near KY-44, Preston Highway, Hillview, Brooks, and older Bullitt County neighborhoods can have different wall textures, ceiling heights, attic access issues, and humidity exposure. Finished basements and lower-level rooms may need extra caution before closing a wall after moisture.
The service goal is the same whether the job is a small ceiling cut, a bathroom wall repair, or a larger flood-cut section: make the drywall stable, make the finish believable under real room light, and leave the owner with clear expectations. That is not a shortcut process. It is a controlled sequence.
Ceiling stains need a different eye than wall stains
Ceiling water damage creates a separate set of finish problems. Gravity pulls moisture into seams and fastener lines, and overhead light can make even a small repair read like a shadow. If a ceiling texture is older, the patch may require a broader blend than the damaged area suggests. A small square cut can be structurally correct but visually loud if the compound edge stops too close to the patch.
Access also changes the work. Vaulted ceilings, stairwell ceilings, garage ceilings, and bathroom ceilings all require different staging and protection. A ceiling repair over a kitchen island or hallway traffic path needs dust control, ladder access, and drying windows planned before the room is put back together. When homeowners send photos, it helps to include the whole ceiling plane and the nearest light fixture so the quote can account for real viewing conditions.
Material choices should match the room, not just the hole
Water-damage drywall repair is not always a simple like-for-like board swap. A bathroom, laundry, garage, basement, or utility area may call for moisture-resistant board depending on the location and code context. A living room or bedroom repair may only need standard gypsum board but a more careful finish blend. The material decision should match the room, the exposure risk, and the finish expectation.
That same logic applies to corner bead, tape, compound, and primer. Damaged outside corners may need bead replacement instead of extra mud over a weak edge. Stained areas often need stain-blocking primer after the board is dry and repaired. Heavy compound over damp or stained paper is not a fix; it is a delay. The better repair stack is dry substrate, sound board, clean joints, appropriate primer, then final finish.
How a repair timeline usually unfolds
Most water-damage repairs involve more than one visit because compound needs time to dry between passes. A small patch can still require board work, prefill, tape, one or more finish coats, sanding, texture, primer, and inspection. Weather and humidity matter. So does airflow. Rushing those steps can leave shrinkage, soft edges, or texture that changes after paint.
For urgent situations, the smartest move is not to promise impossible same-hour finish work. It is to stabilize the scope, protect the room, and make the sequence clear. If paint is being handled by another trade or by the homeowner, the drywall handoff should say what is paint-ready, what has been primed, and what needs a final light check. Clear handoffs prevent the common problem where a good patch gets blamed for rushed paint or skipped primer.
Final takeaway
A clean water-damage drywall repair in Shepherdsville starts with patience: stop the source, verify the wall is dry, remove compromised material, rebuild with solid backing, blend the finish, and inspect under primer before paint. Patching too soon can hide problems. Planning the repair correctly makes the finished wall quieter, stronger, and easier to stand behind.
Need water-damage drywall repair in Shepherdsville or Bullitt County? Send us photos and timeline details and we will provide a written quote within one business day.